Quickstart
Prerequisites
The FnFlow project supports the local installation based on Multipass for Linux, macOS and Windows. Multipass has to be installed on your system. Please follow the installation guide of Multipass.
Install FnFlow
-
Download the cloud-init Ubuntu-24.04.user-data configuration.
-
Launch a VM passing the downloaded file as
--cloud-initparametermultipass launch -n fnflow --cpus 4 --disk 20G --memory 8G --cloud-init Ubuntu-24.04.user-data -
Initialize the platform
multipass exec fnflow -- bash -c 'cd fnflow/deploy; helmfile -e local apply' -
multipass exec fnflow -- bash -c 'IP=$( hostname -I | cut -f 1 -d " " ); echo -e "Manager http://$IP:32581\nOpensearch Dashboards http://$IP:5601\nAKHQ http://$IP:32551\nKafkaService http://$IP:32580\nOpensearch REST API http://$IP:9200"'
This should give an output similar to the following:
Manager http://10.48.190.147:32581
Opensearch Dashboards http://10.48.190.147:5601
AKHQ http://10.48.190.147:32551
KafkaService http://10.48.190.147:32580
Opensearch REST API http://10.48.190.147:9200
Creating the very first Pipeline
Pipelines can be created via the Manager UI. Open the Manager Url in a browser.
This should bring up the following:
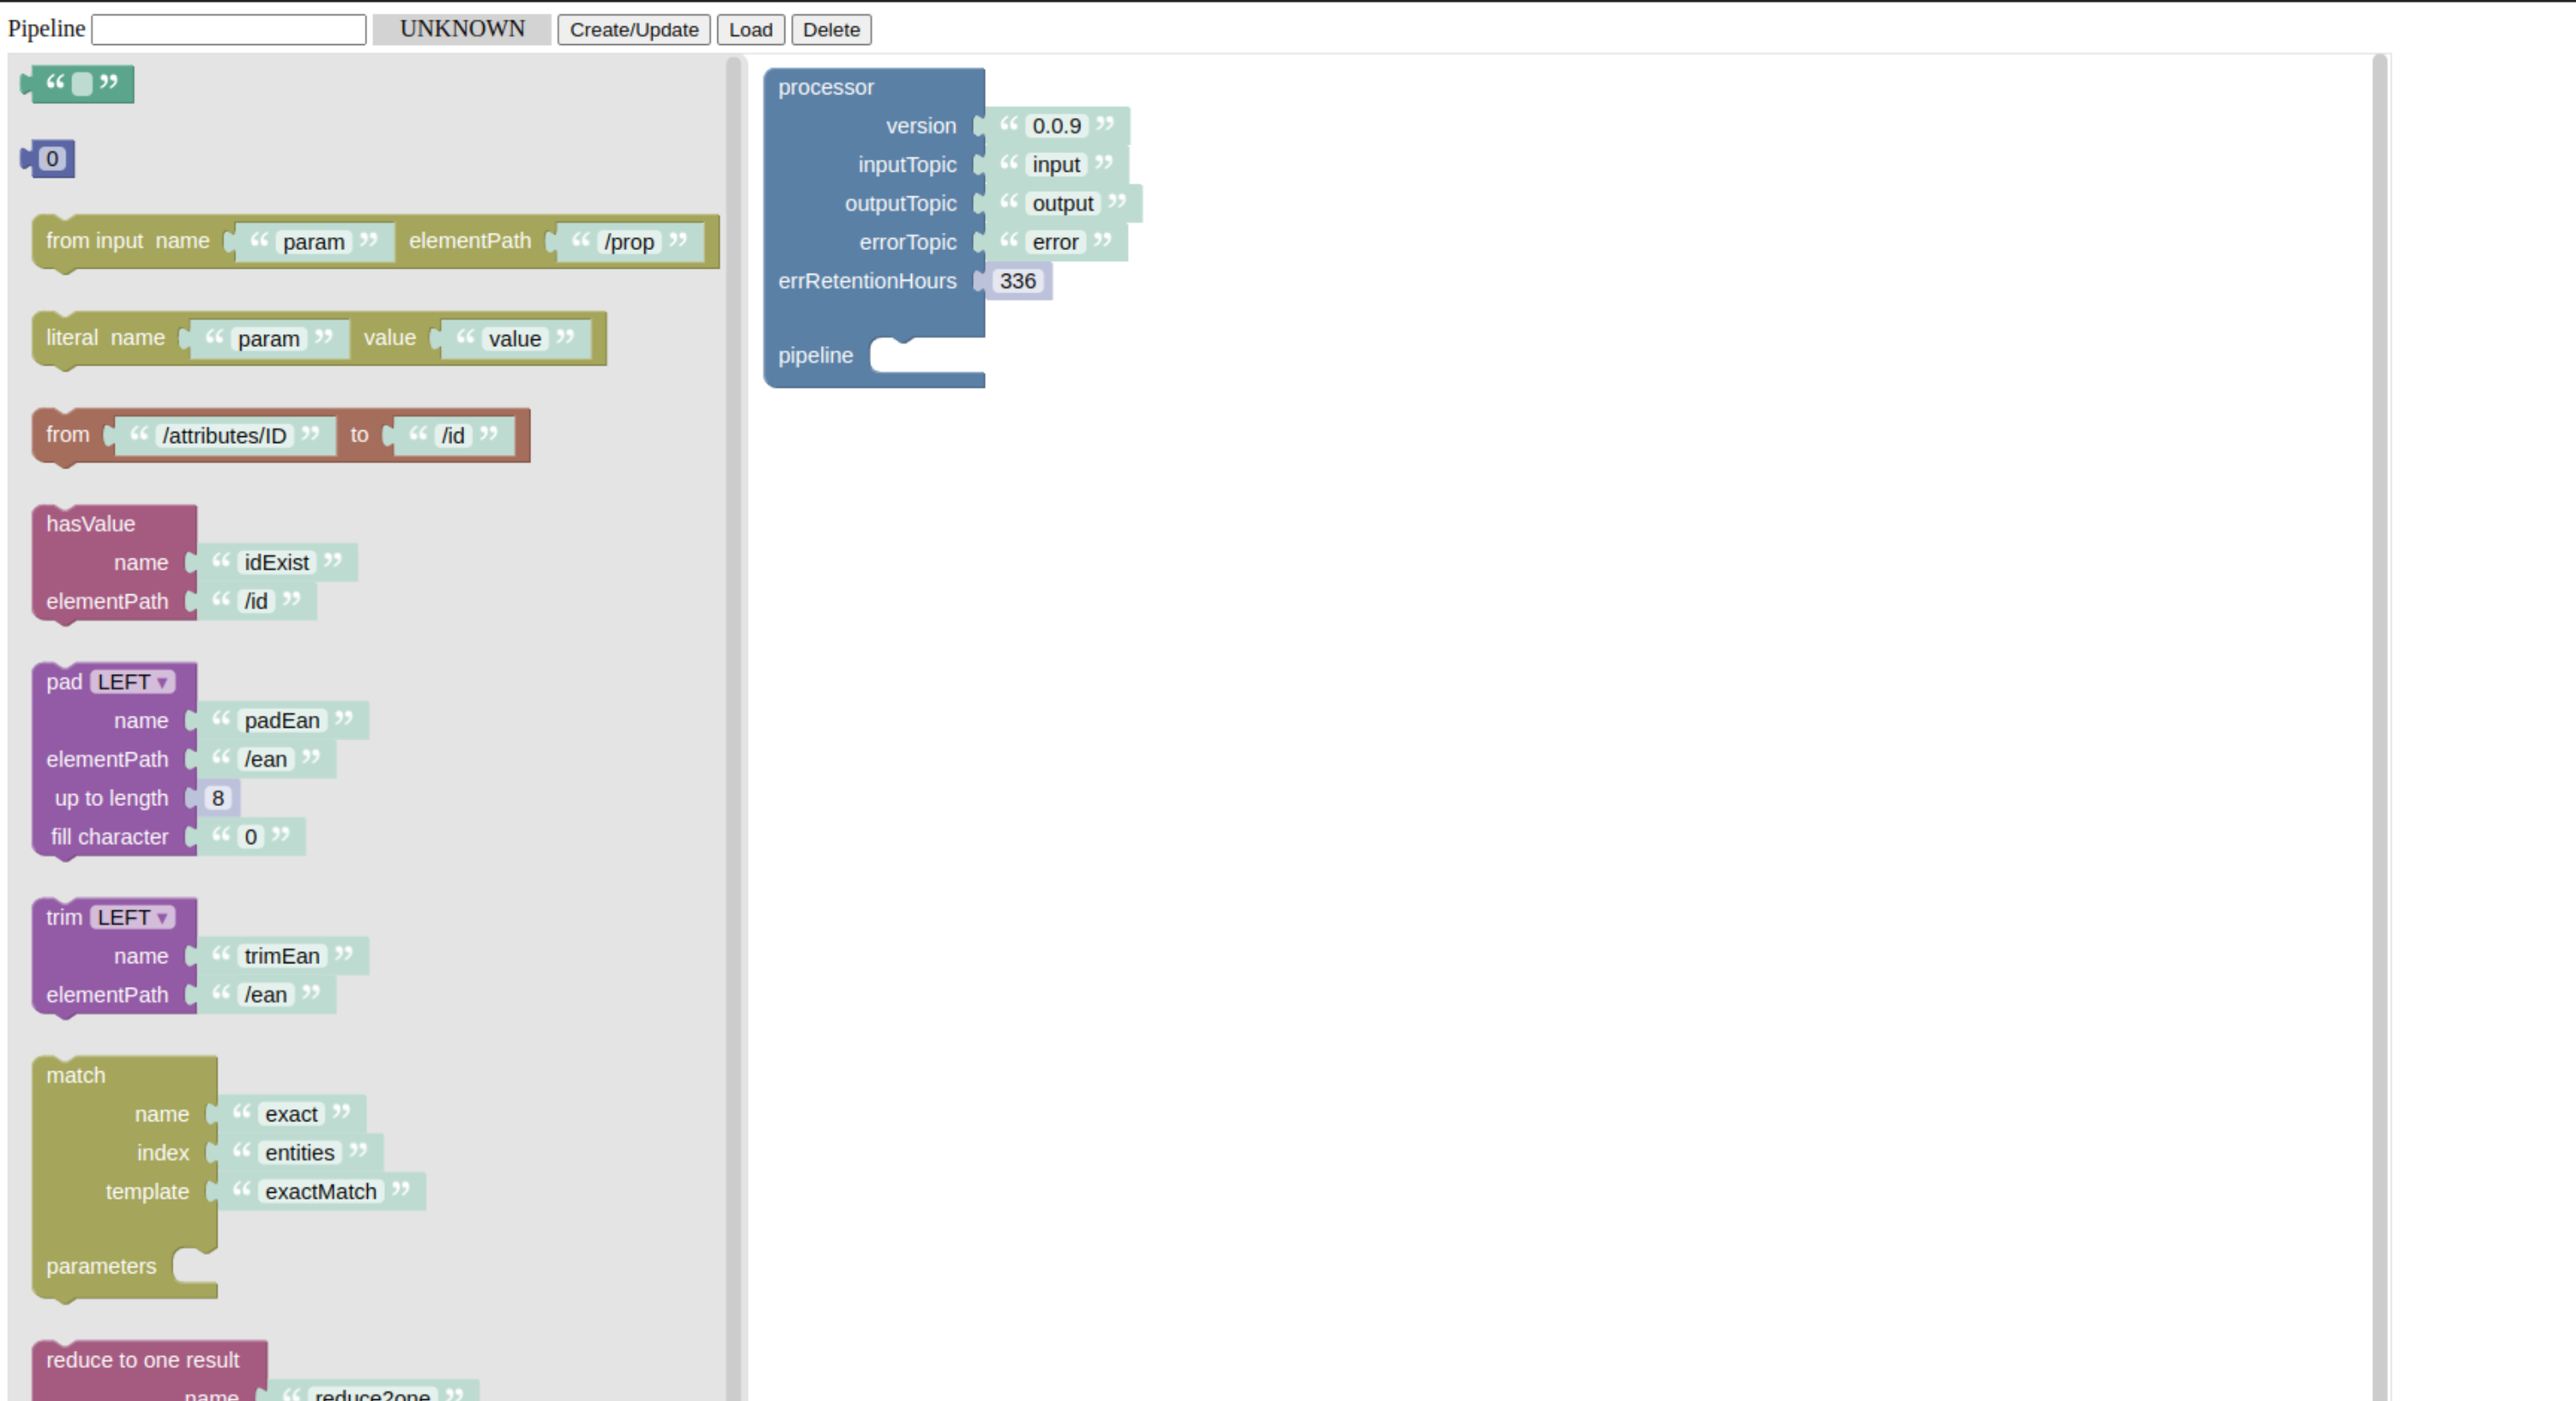
This is where a processor pipeline can be created and deployed. On the right hand side there is the container for a processor with its default configuration properties. These are:
| Property name | Description |
|---|---|
version |
The application version of the processor |
inputTopic |
The Kafka topic the processor gets its input data from |
outputTopic |
The default Kafka topic being used to write the output to |
errorTopic |
The Dead Letter Topic (DLT), a Kafka topic, error events are written |
errRetentionHours |
The time in hours error events will stay in the DLT |
Every property has a sensible default already, so we will not change anything here.
On the left hand side, there is a toolbar providing building block for the pipeline. We will just take the hasValue block and put it into the pipeline slot of the processor through drag and drop.
hasValue is a validator checking if the input is having a value on a certain json path. Here, the default is to check for a value under the path /id. We will stay with the defaults for now.
This is already forming a minimal pipeline passing input events to the output topic, if the property /id is having a value. If not, the input event is passed to the DLT.
Let’s deploy this pipeline. This is done by giving the pipeline a name in the input on the top of the screen. The name should consist of lowercase characters only. After typing the name, we press the Create/Update button. This will deploy the pipeline with the given name. For a successful deployment, the status will go to green showing a RUNNING.
Congratulations! Your very first FnFlow pipeline is up and running!
Testing a Pipeline
All input data for the pipeline is passed via the configured input topic. There are several possibilities to provide data to the pipeline. For testing, this can be done using the AKHQ UI. Open the AKHQ url as printed out by Get the platform service urls. AKHQ can be used to place data in the input topic of the pipeline and to show the results placed in the output or error topic by the running pipeline. This is shown in the following video:
The validator will route the second event, without an id value to the error topic.